
Anúncios
Master the Art of Macramé: Your Complete Journey

Start Creating Today
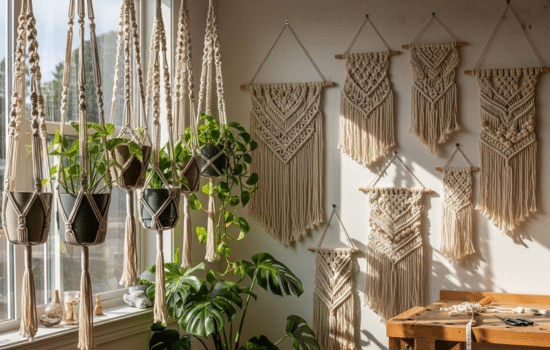
Macramé has experienced an incredible renaissance in recent years, transforming from a retro craft into a modern art form that graces homes, fashion runways, and creative studios worldwide. This ancient technique of knotting cords into decorative patterns offers endless possibilities for creating beautiful wall hangings, plant hangers, jewelry, home décor, and so much more. Whether you’re looking to develop a new creative hobby, start a handmade business, or simply add personalized touches to your living space, learning macramé opens doors to a world of artistic expression.
The beauty of macramé lies in its accessibility – you don’t need expensive equipment or a dedicated studio space to get started. With just some cord, your hands, and a willingness to learn, you can create stunning pieces that reflect your personal style. This complete guide will walk you through everything you need to know, from understanding basic knots to mastering complex patterns that will impress even seasoned crafters. 🧵
Anúncios
Understanding the Fundamentals of Macramé
Before diving into your first project, it’s essential to grasp what macramé truly is and why it has captivated crafters for centuries. Macramé is the art of tying knots in a specific sequence to create decorative textiles. Unlike weaving or knitting, macramé doesn’t require any tools beyond your hands – it’s all about manipulating cords through various knotting techniques.
The origins of macramé trace back to 13th-century Arabic weavers, though the technique has appeared in various cultures throughout history. The term itself comes from the Arabic word “migramah,” meaning decorative fringe. Sailors popularized macramé in the 19th century, creating elaborate pieces during long voyages and trading them at ports worldwide. The 1970s saw macramé become a household craft phenomenon, and today it’s experiencing a remarkable comeback with contemporary designs and applications.
Anúncios
Essential Materials Every Beginner Needs
Starting your macramé journey requires surprisingly few materials. Here’s what you’ll need to gather before beginning your first project:
- Cord or rope: Cotton cord is ideal for beginners due to its softness and workability. Start with 3mm or 4mm single-strand cotton cord.
- Scissors: Sharp fabric scissors will cleanly cut your cords without fraying.
- Measuring tape: Accurate measurements ensure you have enough cord for your projects.
- Dowel rod or branch: These serve as mounting points for wall hangings and similar projects.
- S-hooks or rings: Useful for plant hangers and decorative pieces.
- Masking tape or clipboard: Helps secure your work while you’re learning.
- Comb or brush: For creating beautiful fringe effects at the end of projects.
As you advance, you might explore different cord materials like jute, hemp, nylon, or even leather, each offering unique textures and aesthetic qualities. The thickness of your cord dramatically affects the final appearance – thicker cords create bold, statement pieces while thinner cords produce delicate, intricate designs. ✨
The Foundation: Mastering Basic Knots
Every macramé masterpiece begins with a handful of fundamental knots. Once you’ve mastered these core techniques, you’ll be able to tackle virtually any pattern. Think of these knots as your artistic alphabet – combine them in different ways to create your unique visual language.
The Lark’s Head Knot: Your Starting Point
The Lark’s Head Knot (also called a Cow Hitch) is typically the very first knot you’ll learn, as it’s used to attach cords to your working surface. Fold your cord in half, place the loop over your dowel rod, then pull the cord ends through the loop. This simple attachment method secures your working cords and creates a clean, professional starting edge.
There’s also a Reverse Lark’s Head Knot, which creates a slightly different texture at the top of your piece. Experimenting with both variations helps you understand how subtle technique changes affect your final design.
Square Knots: The Cornerstone of Macramé
The Square Knot is arguably the most important knot in macramé. This versatile knot creates beautiful, symmetrical patterns and forms the basis of countless designs. To tie a square knot, you’ll work with four cords – the two outer cords are your working cords, while the two inner cords remain stationary as filler cords.
Start by taking the left working cord over the filler cords and under the right working cord. Then take the right cord under the filler cords and up through the loop on the left side. Pull tight. For the second half, reverse the process: right cord over the fillers and under the left cord, then left cord under the fillers and up through the right loop. When done correctly, you’ll have a flat, balanced knot.
Common variations include alternating square knots (creating a mesh-like pattern) and square knot spirals (tying only one half of the knot repeatedly to create a twisted effect). 🌀
Half Hitch and Double Half Hitch Knots
Half hitch knots create diagonal and horizontal lines in your macramé work, adding structure and visual interest. The double half hitch (two consecutive half hitches) is particularly important as it creates firm, defined lines.
For diagonal lines, hold one cord taut at an angle (this becomes your filler cord) and tie double half hitches around it with each working cord in sequence. The direction you angle your filler cord determines whether your line slopes left or right. Horizontal lines work the same way but with the filler cord held straight across.
These knots are essential for creating geometric patterns, leaves, feathers, and other detailed design elements that elevate your work from simple to sophisticated.
Planning and Calculating Your First Project 📐
One of the biggest challenges beginners face is determining how much cord they’ll need. Running out of cord halfway through a project is frustrating, while having excessive waste isn’t cost-effective. Understanding cord calculations saves both time and money.
The general rule of thumb is to cut each working cord approximately four times the length of your finished project. For example, if you’re making a 3-foot wall hanging, cut each cord to 12 feet. However, this varies based on knot density – projects with many tight knots require more cord than loose, open designs.
Here’s a helpful reference table for common projects:
| Project Type | Cord Multiplier | Example (3ft project) |
|---|---|---|
| Simple plant hanger | 4x length | 12 feet per cord |
| Dense wall hanging | 5-6x length | 15-18 feet per cord |
| Loose, open design | 3-4x length | 9-12 feet per cord |
| Jewelry (bracelet) | 6-8x length | 4-5 feet per cord |
Always add an extra 10-20% to your calculations as a safety buffer. It’s better to trim excess cord at the end than to restart because you measured too conservatively.
Your First Three Beginner Projects
Theory only takes you so far – the real learning happens when you put cord in hand and start creating. These three beginner-friendly projects build upon each other, gradually introducing new techniques while reinforcing what you’ve already learned.
Project 1: Simple Plant Hanger
A basic plant hanger is the perfect first project because it’s functional, forgiving of minor mistakes, and uses only square knots and gathering techniques. You’ll need eight cords, each about 10 feet long (for a hanger that holds a pot about 4 inches in diameter).
Start by attaching all cords to a ring using Lark’s Head Knots. Create a series of square knots about 6 inches below the ring, then separate the cords into four groups. Work alternating square knots down each section to create the cradle that will hold your pot. Gather all cords together at the bottom and secure with a wrapped knot, leaving a tassel at the end. The entire project takes 1-2 hours and results in a practical piece you’ll use daily. 🪴
Project 2: Mini Wall Hanging
Once you’re comfortable with square knots, progress to a small wall hanging that incorporates double half hitch knots for diagonal design lines. Cut 12 cords, each 6 feet long, and attach them to a 12-inch dowel rod.
Create a row of square knots across the top, then add diagonal lines using double half hitch knots to form a V-pattern. Fill the center with alternating square knots, add another set of diagonal lines pointing downward, and finish with a row of square knots before creating fringe. This project introduces pattern-reading skills and spatial planning – essential for more complex designs later.
Project 3: Decorative Keychain or Bookmark
Small accessories are excellent for practicing new knots and experimenting with different cord types and colors. A keychain requires just 2-3 cords about 3 feet long each. Try creating a square knot spiral or alternating half hitch patterns, then attach a key ring at the top and add beads for visual interest.
These miniature projects are perfect for using up leftover cord from larger pieces, and they make thoughtful handmade gifts that showcase your developing skills. ✨
Advancing Your Skills: Intermediate Techniques
After completing several beginner projects, you’ll notice your hands moving more confidently and your knots becoming more consistent. This is the perfect time to expand your repertoire with intermediate techniques that add complexity and visual impact to your work.
Working with Color and Texture
Incorporating multiple colors transforms simple patterns into eye-catching designs. Start with two-color combinations before progressing to complex gradients or rainbow effects. When working with colored cord, pay attention to how knots affect color distribution – square knots show both colors equally, while double half hitches hide the filler cord color.
Mixing cord textures creates fascinating contrasts. Combine smooth cotton with rustic jute, or blend matte and shiny materials. Three-strand twisted cord behaves differently than single-strand, and braided cord offers yet another aesthetic. Understanding these material properties helps you make intentional design choices rather than defaulted decisions.
Advanced Knot Variations
The Berry Knot (or Josephine Knot) creates beautiful decorative elements that look complex but are surprisingly achievable with practice. This ornamental knot adds dimensional interest to otherwise flat pieces.
Wrapped knots gather multiple cords together cleanly, perfect for finishing plant hangers or creating defined sections in wall hangings. The wrapped portion itself becomes a design element, especially when done with contrasting colored cord.
Learning to create leaves, feathers, and geometric shapes using combinations of basic knots opens up endless design possibilities. These elements can be incorporated into larger pieces or stand alone as statement components.
Designing Your Own Patterns 🎨
The transition from following patterns to creating your own designs marks a significant milestone in your macramé journey. This creative leap requires understanding not just how to tie knots, but how knots interact to create overall composition, balance, and visual flow.
Start by sketching rough ideas on paper. You don’t need artistic drawing skills – simple lines and shapes help you visualize proportion and placement. Consider the space where your finished piece will hang or sit. A narrow vertical wall hanging suits different spaces than a wide horizontal piece.
Think about focal points. Where do you want the viewer’s eye to travel? Dense knotwork naturally draws attention, as do color changes and dimensional elements. Negative space (areas with minimal knotting) provides visual rest and makes detailed sections stand out more dramatically.
Creating Balanced Compositions
Balance doesn’t necessarily mean symmetry, though symmetrical designs certainly have their place. Asymmetrical pieces can feel perfectly balanced through careful distribution of visual weight. A large dense section on one side can be balanced by several smaller detailed elements on the other.
Consider rhythm and repetition. Repeated elements create cohesion, while variations on those elements maintain interest. This might mean using the same knot pattern in different scales or rotating diagonal lines in alternating directions.
Troubleshooting Common Challenges
Every macramé artist encounters challenges, especially when learning. Recognizing common problems and knowing how to address them prevents frustration and keeps your creative momentum flowing.
Uneven tension: This is the most common beginner issue. If your knots look loose or irregular, focus on maintaining consistent pull strength. Too tight and your piece becomes stiff and compacted; too loose and it looks messy. Practice on scrap cord until muscle memory develops.
Twisted cords: Cords naturally twist as you work. Stop periodically and let them hang freely to untwist, or manually straighten them. This is especially important with multi-strand twisted cord.
Running out of cord: If you realize mid-project that a cord is too short, you can sometimes add length by carefully tying on a new section, then working that join into the back of your piece where it won’t show. Prevention through proper calculation is always preferable.
Pattern mistakes: Notice an error several rows back? For small mistakes in non-structural areas, leaving them creates character and proves your piece is handmade. For significant errors, it’s better to untie back to the mistake and redo it correctly. This is frustrating but teaches valuable lessons about attention to detail. 💫
Finishing Techniques for Professional Results
How you finish a piece dramatically impacts its overall appearance and longevity. Professional finishing techniques distinguish amateur work from polished, gallery-worthy pieces.
For fringe ends, decide whether you want a natural, slightly uneven look or perfectly uniform ends. Uniform fringe requires careful measurement and straight cutting. After cutting, use a pet brush or wide-toothed comb to separate the cord strands, creating a soft, feathery effect.
Some projects benefit from stiffening the finished piece with fabric stiffener or a mixture of water and white glue. This helps wall hangings hold their shape and prevents cords from shifting over time. Apply with a spray bottle or brush, then shape the piece as it dries.
Properly securing the back of your work prevents unraveling. Weave cord ends back through several knots on the reverse side before trimming, or use a small amount of fabric glue on the cut ends. For pieces that will be handled frequently (like jewelry or bags), this step is essential for durability.
Turning Your Hobby into Income Opportunities 💰
Many macramé enthusiasts discover that their creative passion has commercial potential. The handmade market values unique, well-crafted pieces, and macramé items consistently sell well at craft fairs, online marketplaces, and through social media.
Start by honestly assessing your skill level and production capacity. Beginning sellers often underprice their work, failing to account for materials, time, overhead, and profit margin. A helpful pricing formula is: (Materials Cost + Hourly Rate × Hours Worked) × 2 = Wholesale Price, then Wholesale Price × 2 = Retail Price.
Develop a signature style that makes your work recognizable. This might be your color palette choices, specific techniques you excel at, or the types of pieces you create. Consistency helps build a brand identity that customers recognize and return to.
High-quality photographs are absolutely essential for online sales. Natural lighting, clean backgrounds, and images showing scale (the piece in a room setting or being held) help customers envision the item in their own space. Include detail shots that showcase your knotwork quality.
Sustainable and Mindful Crafting Practices 🌿
As awareness of environmental impact grows, many crafters embrace sustainable practices. Macramé naturally aligns with eco-friendly values since it requires no electricity and produces minimal waste, but you can take additional steps toward sustainability.
Choose natural, biodegradable fibers like organic cotton, hemp, or jute rather than synthetic materials. Research your cord suppliers – some companies prioritize fair labor practices and environmental responsibility. While these materials may cost slightly more, many crafters find the ethical alignment worth the investment.
Save every cord scrap. Short pieces work perfectly for jewelry, keychains, bookmarks, and embellishments on larger projects. Very small scraps can be composted if they’re natural fiber, or saved as stuffing material.
Consider where your finished pieces will eventually end up. Natural fiber macramé can be composted at the end of its useful life, unlike synthetic alternatives that persist in landfills. Educate customers about proper care to extend the lifespan of their pieces, reducing overall consumption.
Building Your Creative Community
Crafting doesn’t have to be solitary. Connecting with other macramé enthusiasts provides inspiration, troubleshooting help, encouragement, and friendship. The global macramé community is welcoming and generous with knowledge sharing.
Social media platforms, particularly Instagram and Pinterest, host thriving macramé communities. Search hashtags like #macrame, #macrameartist, or #macramewallhanging to discover other makers. Engage genuinely with their work – thoughtful comments build relationships more effectively than generic praise.
Consider joining online groups or forums dedicated to fiber arts and macramé. These spaces allow you to ask questions, share progress photos, and learn about new techniques. Many experienced artists willingly mentor beginners, remembering when they themselves were learning.
If possible, attend local craft circles, workshops, or maker meetups. In-person connections offer unique benefits – you can see techniques up close, feel different cord types, and build local friendships with people who share your passion. Some craft stores host regular crafting nights specifically for fiber arts. 🤝
Continuing Your Macramé Education Journey
Mastering macramé is a lifelong journey rather than a destination. There’s always a new technique to explore, a more challenging pattern to attempt, or a creative boundary to push. Embrace this ongoing learning process as part of the craft’s appeal.
Invest in quality instructional resources beyond free online content. Well-produced courses, comprehensive books, and detailed pattern collections provide structured learning paths that accelerate skill development. Many experienced teachers offer online classes with personalized feedback, creating accountability and guidance that self-directed learning sometimes lacks.
Challenge yourself regularly with projects slightly beyond your current comfort zone. This strategic discomfort drives growth. If you’ve mastered plant hangers, attempt a complex wall hanging. If you’re comfortable with monochrome designs, introduce color theory principles. Each challenge overcome expands your capabilities and confidence.
Document your progress through photos, notes, or a dedicated crafting journal. Looking back at your early work reveals how dramatically your skills have improved, providing motivation during inevitable creative plateaus. This documentation also helps you remember successful techniques, material sources, and lessons learned from past mistakes.
Most importantly, remember why you started this journey. Whether your motivation was stress relief, creative expression, home decoration, or community connection, returning to that core purpose keeps your practice meaningful and joyful. Macramé offers endless opportunities for mindful creation, tangible accomplishment, and artistic satisfaction that enriches daily life in countless ways. The knots you tie today create not just beautiful objects, but also skills, confidence, and creative fulfillment that last far beyond any individual project. 🌟